canva
How to Set Up your Nonprofit’s Team in Canva

Published by
The Nonprofit Template Shop
Posted on
May 11, 2022
Updated on November 29, 2022

One of the things we love most about Canva is the rate at which the developers innovate, bringing all of us amazing new or improved features and functions.
That said, that innovation can make it difficult for those of us who use the application to keep up with all of the changes. Though we do our best to keep abreast of those changes, you may notice that some elements of the content below appear slightly different from the view you see in your Canva account. If you need any help following any of the steps you see here, please reach out to us! We’re always happy to support you.
One of the features that we love about Canva is the ability to share and co-create designs with your team. With Canva Teams, team members can be invited right from your Canva dashboard and can be assigned roles that give them different access permissions. Once added, your team will be able to create and edit designs together in real-time. You can even communicate with your team by adding comments, sharing feedback, and assigning tasks.
Here’s how to get started with Canva Teams so you can access those benefits:
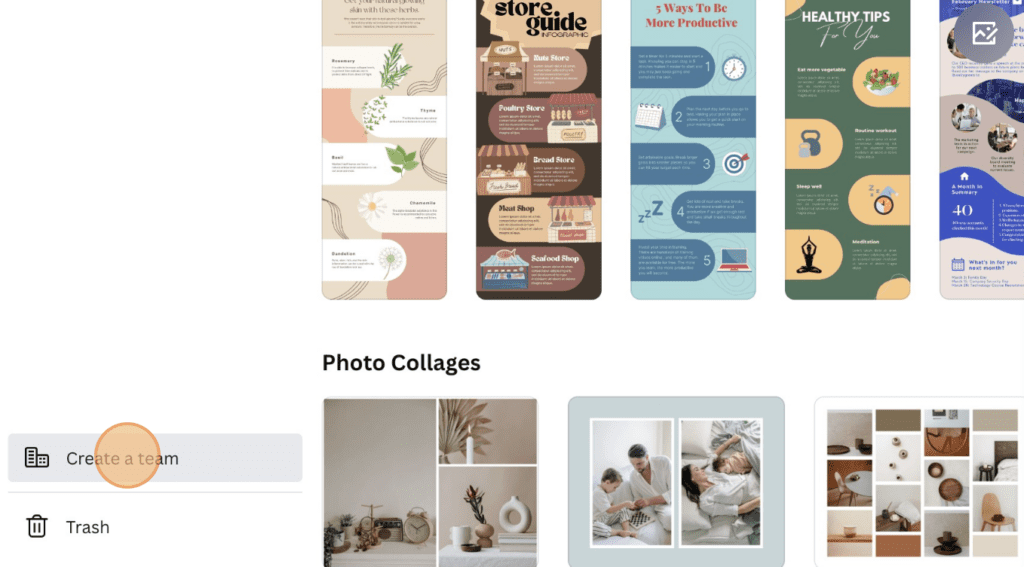
1. While logged in to Canva, click ‘Create a team,’ found in the bottom left sidebar.
2. Next, you’ll see a dialogue box where you can enter a name for your new team. Don’t worry — you can change your team name later if you need to.
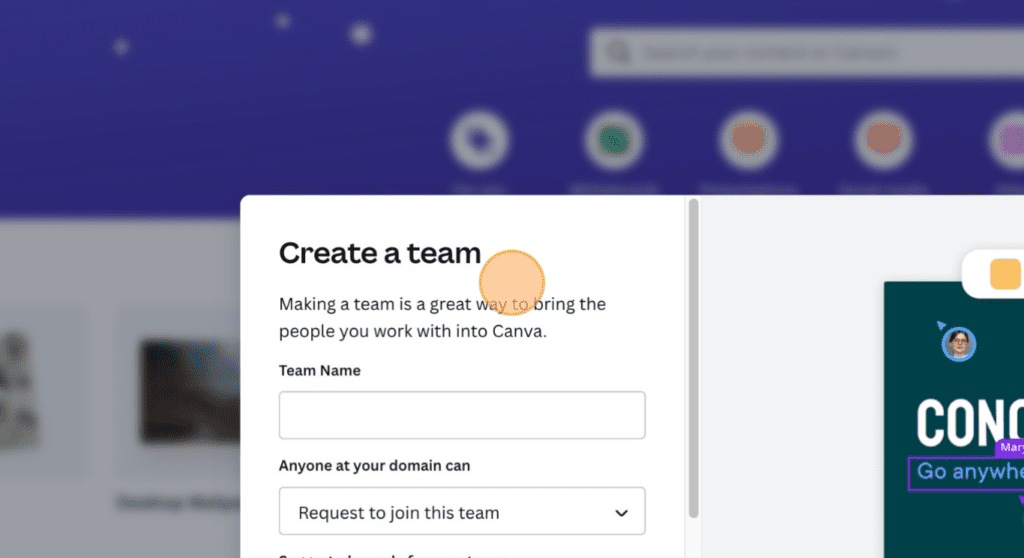
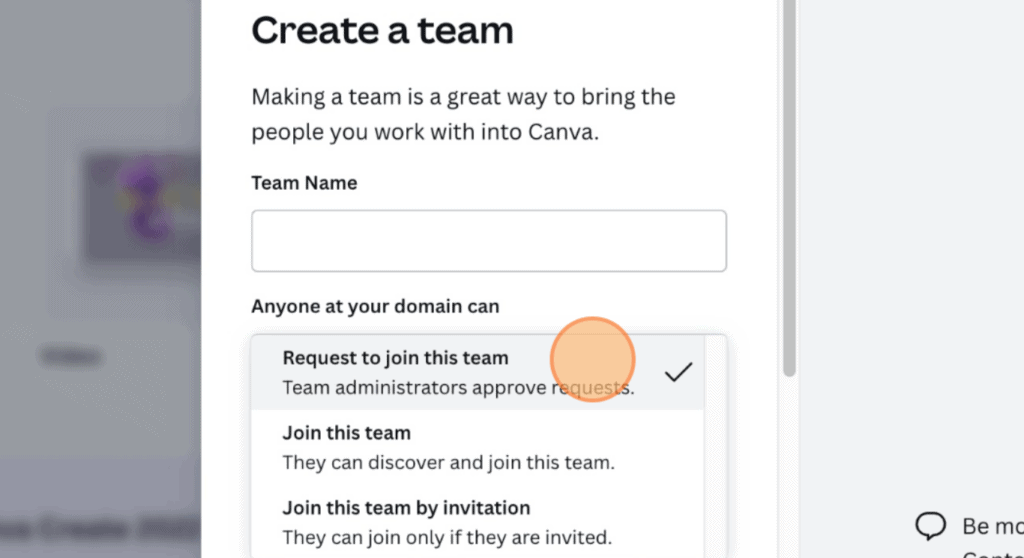
3. After choosing a name, you’ll see the option to choose administrative control over how to add team members. You have three choices:
- Request to join this team Team administrators approve requests.
- Join this team They can discover and join this team.
- Join this team by invitation They can join only if they are invited.
4. You’ll also be able to scroll down in that dialogue box to enter the email addresses of your future team members or to generate an invite link to share with them.
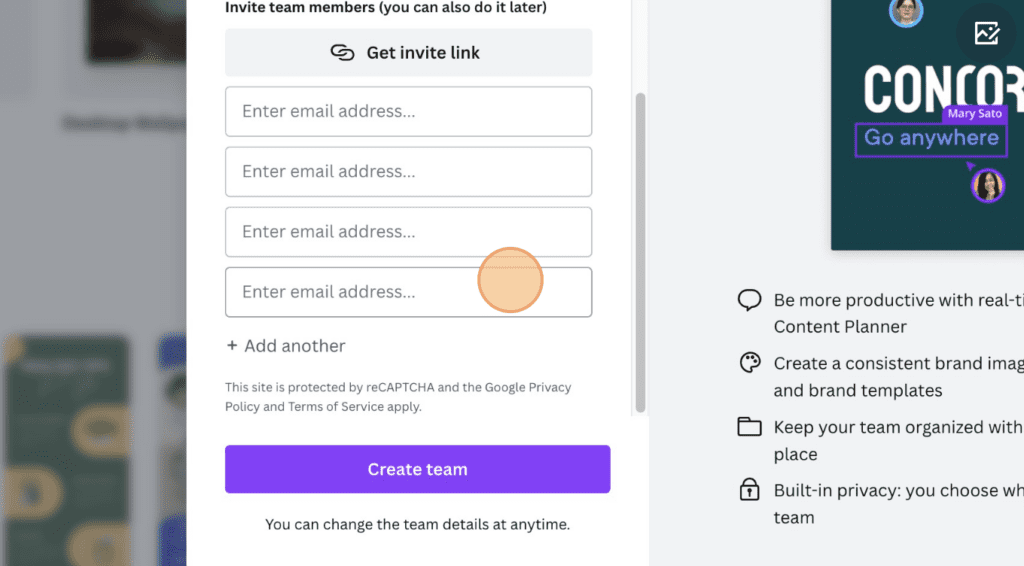
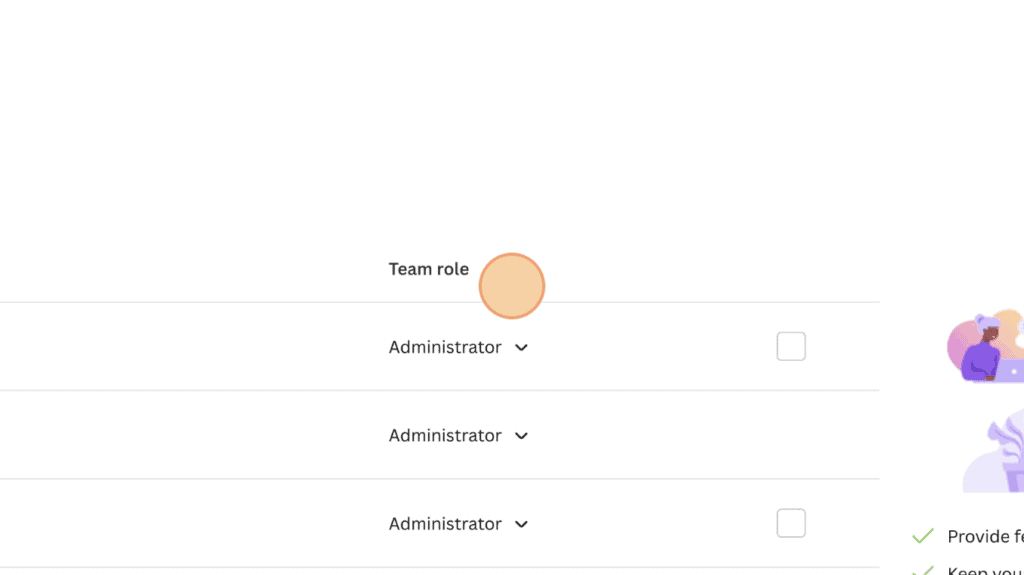
6. When invited team members accept your invitation, they will be added to your People list as default Members, and you’ll be able to adjust their team role as needed. There are four roles: Owner, Administrator, Member, and Template designer. You would also remove team members in this view as well.
Now that you have a team set up, what can you do with it?
Canva Teams has some great features that make designing easier, more efficient, and more streamlined.
- Design together in real-time. Your team can work together on a design from anywhere in the world and from any computer, tablet, or even smartphone.
- Communicate with your team. Share designs, give feedback, and reply to comments on your team’s designs.
- Share access to your organization’s brand kit. Upload your logo, brand colors, and fonts to your brand kit so that all team members can easily access them.
- Access your team assets. Create folders to hold your organization’s templates, projects, graphics, photos, and more.
Here are a few team tips to get you started:
- Share a design. Click the ‘+’ sign to enter the email address of the person with whom you’d like to share your design. If the design has already been shared with others, you’ll see those users’ names listed. If your team uses groups, you can also choose to share a design with members of a specific group.
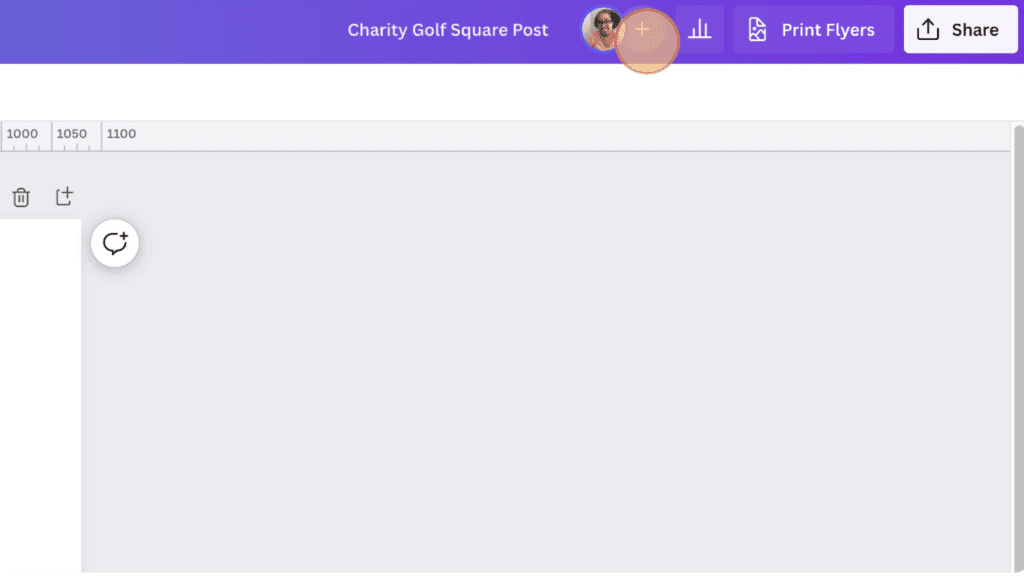
Additionally, clicking the ‘Share’ button will reveal even more options to share your design with other members of your team.
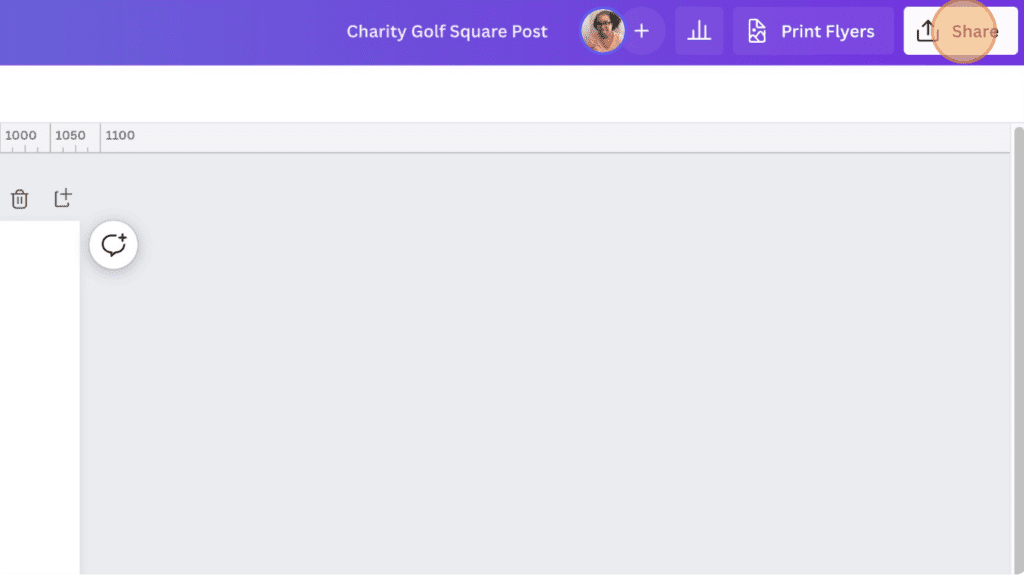
When you add an email address to share a design with someone, you’ll be prompted to choose a level of control for their access — EDIT, COMMENT, or just VIEW — along with a field to add a message that will be sent to them along with the Share this design message. Note that you can change these permission levels at any time by revisiting the share function in any design. As you can see, if you enter an email address not currently associated with your team, you’ll also have the option to check to send the person a Team invite at the same time.

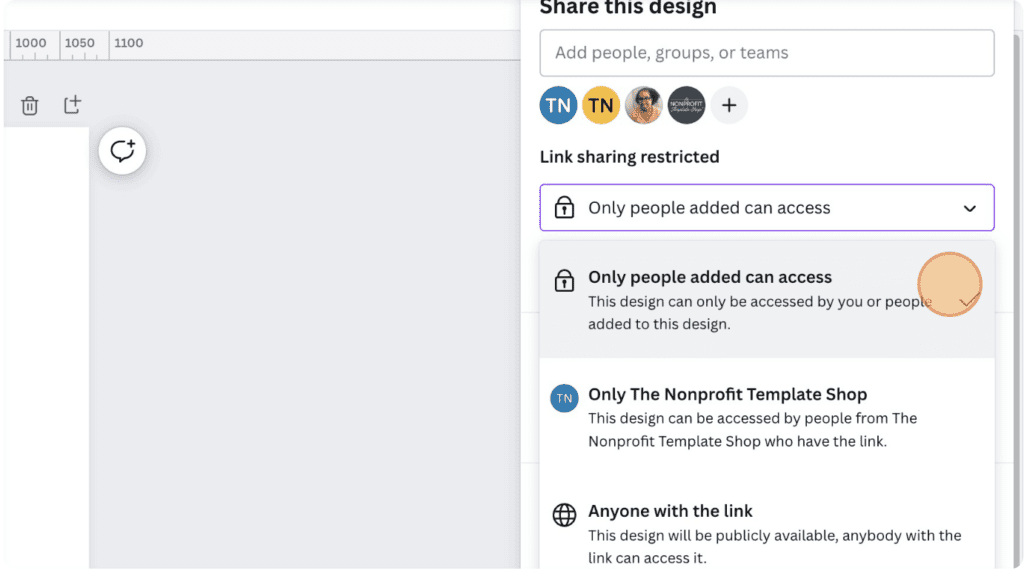
In addition to being able to share a design using email addresses, you can also generate a link to share a design. As shown here, you’ll have three options to consider — only the people whose email addresses you have entered have access to the design, anyone on your team with whom you have shared the link has access to the design, and anyone with the link has access to the design. Note that the option to restrict access only to team members with the shared link is only available to Canva for Teams users.
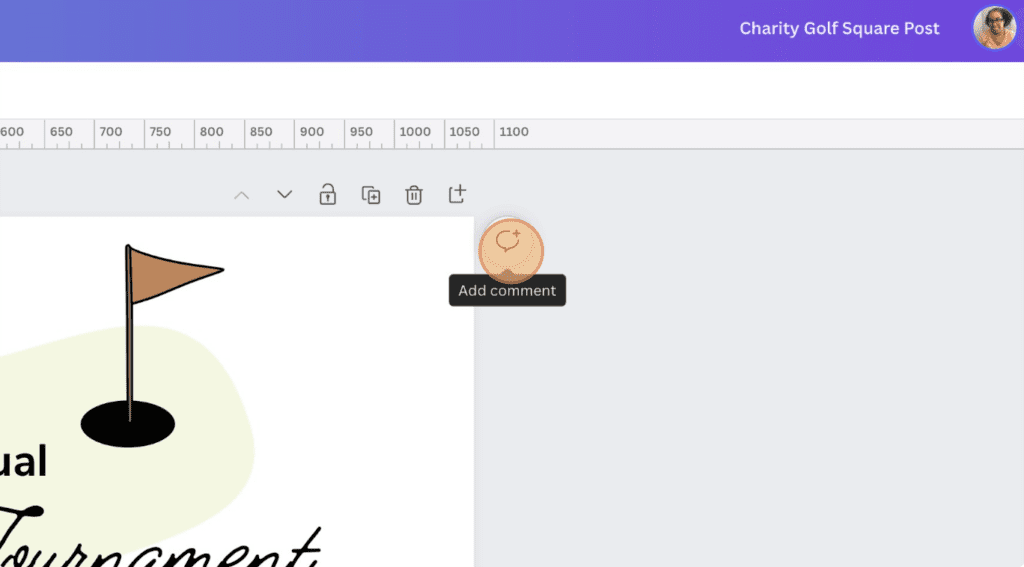
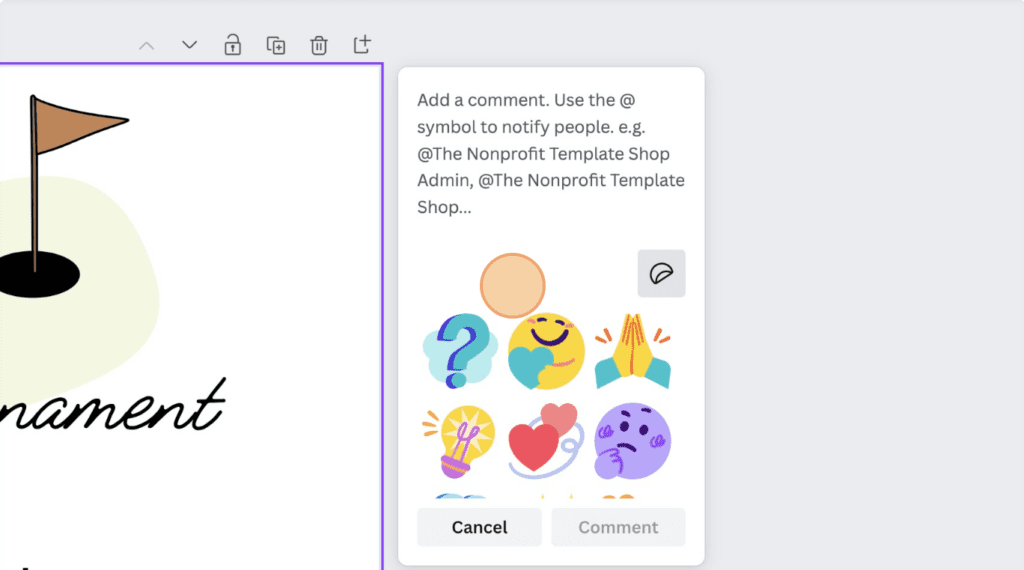
- Comment on a design. To leave a comment on a design, click the ‘Add comment’ button and enter your comment. In addition to writing comments, you can also use the @ function to direct your comment to a specific member of your team. Please note that in addition to leaving a comment, you can also @ mention any member of your team or choose to leave a sticker.
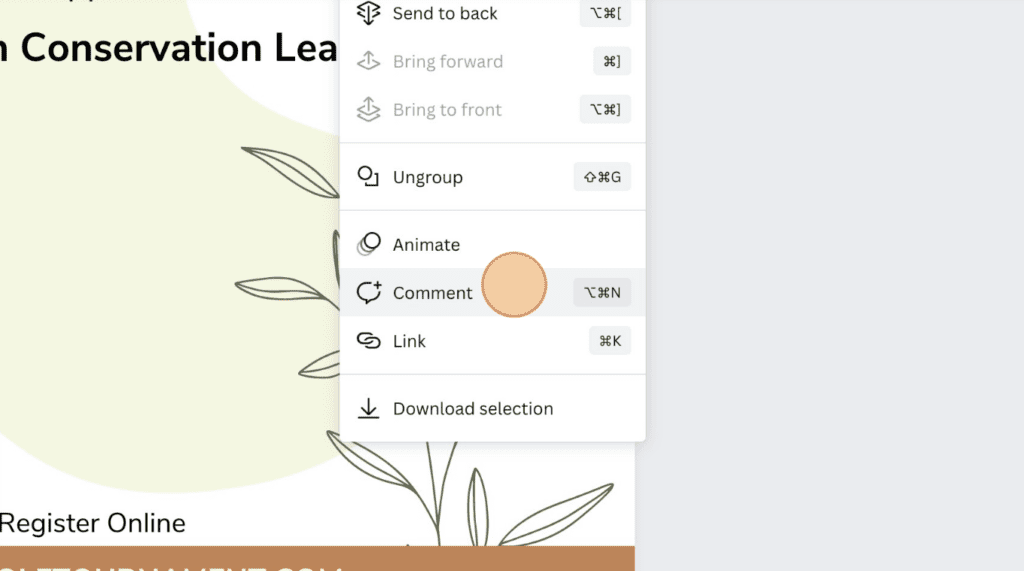
Additionally, you can right-click on any element within a design to leave a comment specific to that element.
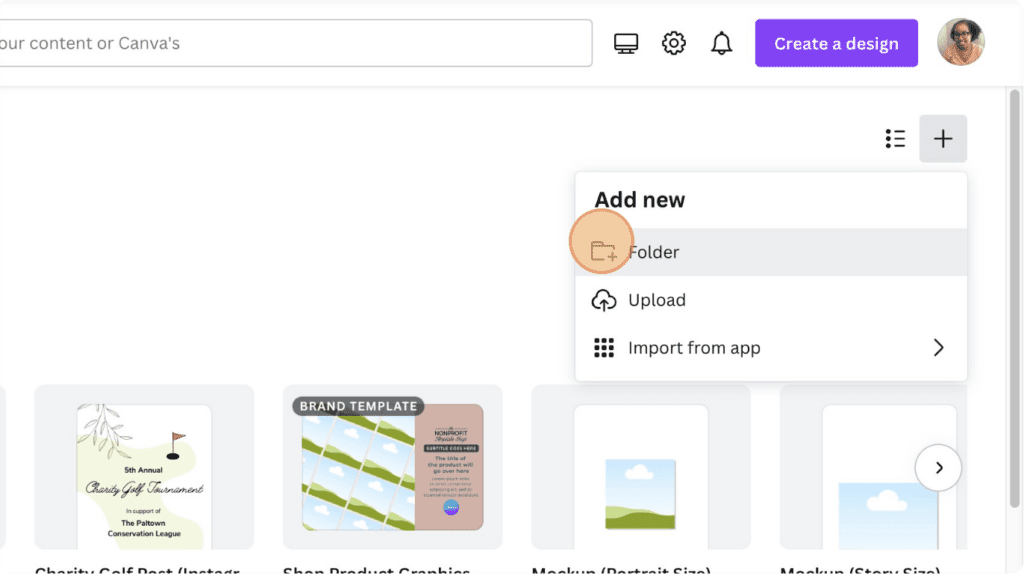
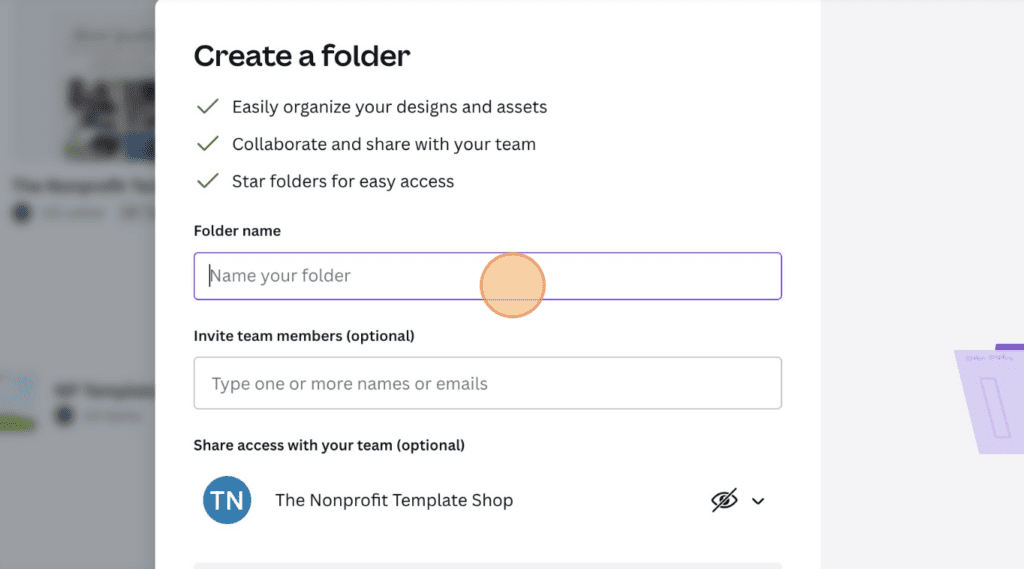
- Create a team folder. Organize your organization’s projects with shared folders. Click on your Projects from the left sidebar of your dashboard, then click ‘Folders’, then ‘Create Folder.’ This allows you to create a new team folder and share it instantly with your team, setting the appropriate permission level. You can create team folders to house templates, brand assets, photos, and more.
We hope these Canva Team tips will help you get the most out of Canva so that you can streamline your design efforts and improve your organization’s brand!
